Replacing Old Gravel Roof with PVC Roofing Membrane in Massachusetts
Reading Time: 8 minutesHi! My name is Dennis Tchernov. If you’re from Massachusetts, you may know me or my team of roofers personally. In the last 20+ years, we have installed, renovated, and repaired dozens of commercial and residential roofs, including membrane roof, in Lawrence, Boston, New England, and throughout the state.

Today, I want to share a complete guide to installing a membrane roof. You will learn about installation approaches and solutions, materials, tools, and life hacks we commonly use in practice, how to install modern roof membranes with insulation, and how to renovate old roofs.
Watch the PVC roof installation process
This step-by-step guide will walk you through each step, ensuring you understand how new roofing is installed and why PVC membrane is considered more durable and reliable than old-school built-up solutions.
Choosing Materials for Membrane Roof in Lawrence
The following materials were chosen for the new roof project:
1. We chose PVC roofing membrane (6ft x 90ft, 60mil. thick) as the main roof covering. This is a versatile single-ply material of medium thickness and standard sizes that is supposed to be an almost perfect choice for residential roofing and the Massachusetts climate. However, different types of roof membranes may vary in thickness (from 40 to 90mil.) Why are PVC roofing systems considered one of the most suitable options for MA? It is much better than the average rubber roof, more durable, water-resistant, eco-friendly, maintenance-free, and more time-tested than the TPO alternative.
2. For roof insulation, we commonly used standard-size insulation boards (4ft x 8ft, up to 3 inches thick). We recommend that you check your local residential insulation requirements in advance. Perhaps it is worth choosing a different material or material of a different thickness in your case. Also, the type of insulation may vary depending on the type of roof.
Choosing Tools
Special attention is paid to measurements during roofing work, especially when choosing, preparing, and installing the membrane. Our roofers usually use roulette (measuring tape), a level, and chalk, which can usually be found in every garage.
We use a screwdriver as a working tool and specialized equipment for fastening and sealing membrane seams—a hot air welding machine.
The complete set of tools may vary depending on the dismantling work you plan to do. As for installation work, modern membranes can be considered relatively simple to install.
Attention! Be sure to use safety equipment and appropriate protective equipment (goggles, gloves, respirator) when working at heights. Remember that you can fall or injure yourself even if you are working at several feet.
The preparatory stage of work
After receiving the materials and collecting all the necessary tools and equipment, you must prepare the roof area where the membrane roof will be installed.
1. Remove old gravel roofing and debris
Begin by removing all gravel and debris from the existing roof. Use a shovel and broom to clean the surface thoroughly. In the case of built-up roofing, this usually takes a long time, which is one of the main disadvantages of old built-up technology. You need to know where to move the old gravel, how to load it onto special equipment, and how to dispose of it. Make sure to dismantle all modified bitumen membranes if needed because PVC membranes are incompatible with bitumen and styrene butadiene styrene (SBS) materials.

2. Inspect the flat roof base
Thoroughly inspect the base of the roof for any damage. Look for cracks, holes, or any signs of structural weakness. Our roofers are confident that checking the surface before installing insulation and membrane is one of the most crucial stages. Structural damage or defects should not be overlooked, as they will affect the service life of the new roof and the risk of leaks.
3. Repair the base
If you find any damage, repair it before proceeding. Take the time to make repairs, even if you have to delay installation for a few days. This may involve patching holes, sealing cracks, or replacing damaged sections. Usually, we use repair compounds that do not react with PVC membranes and are suitable for this type of roofing material.
4. Install insulation boards
Although installing an insulating board requires no special skills, follow simple recommendations. First, lay the insulation boards across the roof surface and ensure the boards are tightly stacked together without gaps. Any cracks can lead to moisture accumulating under the roof’s surface in the future. Use multiple layers if needed to achieve the desired insulation thickness.
5. Follow local building codes for insulation installation.
Our roofers always follow local building standards and codes. If you decide to install a high-quality roof yourself, consult with professional builders to avoid future problems with local authorities and insurance companies.
We once again focus on the critical points of the preparatory stage:
- Clean and repair the roofing surface carefully
- Ensure insulation boards are stacked tightly together
- Use multiple layers to achieve the desired thickness
- Follow building codes when installing insulation
Installation of PVC Membrane Roof
1. Take the first roll of the membrane and unroll the PVC membrane over the roof. Position it so it hangs over all roof edges by approximately 6 feet. Remember that any rolled material, especially those with a thickness of more than 5mil, must be given some time to “rest” and completely straighten out on the surface. It usually takes 15-20 minutes. It is essential to use a level to ensure the membrane is level. There should be no bulges, dimples, or waves on the surface of the membrane.
2. Overlap membrane joints by at least 6 inches. Do not save material at this stage—it is better to play it safe and lay the membrane with an overlap.
3. Mark the locations for staples with chalk. Secure the single-ply roofing PVC membrane to the roof base using staples and a screwdriver. Ensure the staples hold the membrane firmly in place. Use enough staples to keep the membrane securely in place. Use staples even over the whole roof area.
4. Weld the seams. Use hot air equipment to weld the seams between the PVC membrane strips. Ensure seams are tight and waterproof. Weld the overlaps thoroughly to ensure a waterproof seal. Ensure one more time that the seams are tight and waterproof. Make sure you are following the manufacturer’s instructions for welding PVC membranes. Different membranes, including membranes of the same brand but of various thicknesses, have their requirements for welding seams. Remember that seams, especially where the edges of the three sheets of membrane are attached (called T-joints), are considered areas where the risk of leaks is much higher than other surface areas.
We once again focus on the critical points of the installation stage:
- Allow the rolled material to spread out on the surface
- Lay the membranes evenly and level
- Membranes are laid overlapping, including at T-joints
- Secure membranes with the appropriate amount of staples
- When using hot air welding equipment, pay special attention to seams and joints and the manufacturer’s instructions.
Membrane Roof – Final stage
At the final stage, our roofers seal the edges to securely fasten the membranes to the roofing surface and seal it completely. We seal the edges of the PVC membrane using unique profiles designed for this purpose.
At this stage, we also install gutters and other roofing elements that need to be installed according to the project. Particular attention is paid to flashings at the junctions of elements with the roof surface to avoid leaky connections.
Attention! Even though modern membranes provide 100% protection against leaks, designing and installing a reliable drainage system is necessary. Proper drainage will allow rain and meltwater to be removed from the roof surface promptly, avoiding the appearance of puddles. Follow the same recommendation if you install any flat or low slope roof using EPDM membrane (ethylene propylene diene monomer), synthetic rubber, TPO, or other materials.
We once again focus on the critical points of the final stage:
- Pay special attention to the edges of the PVC around the entire perimeter of the roof.
- Securely install the drainage roof system elements. Remember to install proper flashing to avoid leaks.
Membrane Roof – Additional tips and tricks
It is advisable to carry out roofing work in warm and dry weather. Even though the average PVC roof is entirely resistant to weather conditions and summer/winter temperatures, moisture can damage the performance properties of insulation and other components of the roofing cake.
It is even more important to install the roof in warm and dry weather if you use fully adhered membranes laid on the prepared surface using special adhesives. The requirements are the same as those for so-called liquid and foam roofing membranes, which need time to harden.
The second important tip is always to wear protective equipment (goggles, gloves, respirator) to ensure safety. Remember that even solving simple tasks at height, such as clearing debris or seasonally checking the roof for leaks, requires compliance with all safety rules and, if necessary, the use of insurance.
If you are unsure that you can safely carry out installation or other roofing work, we recommend calling local roofers with experience performing the work you need.

Also, follow the membrane manufacturer’s instructions for best results. There are several main types of roofing membranes: PVC and TPO, EPDM roof membranes (or so-called synthetic rubber), and others. Each material has its characteristics, limitations, roof surface requirements, and preferred installation methods. Secondly, there are several brands and even more membrane models, each with different features, even within the same material. Read the instructions on the material packaging carefully and call customer service if necessary.
Roofing requires experience, skills, and equipment. Seek professional help if you don’t know what type of membrane to choose, how to dismantle an old bitumen roof, or how to install PVC membrane properly. Remember that you are installing the roof in such a way that it will serve you for at least 20-30 years. It will probably be better for you to seek help from professional contractors who install the membranes guaranteed to be leak-free, taking into account your project’s architectural, engineering, and aesthetic features.
Membrane Roof – Important Takeaways
One of our fundamental priorities is the client and his wishes. However, they should meet local residential or commercial roof system building codes. When choosing the thickness of the insulation, be guided by building codes since it affects the service life of the roof in winter and summer, as well as the amount of your heating or air conditioning costs.
Do not skimp on laying the membrane overlapping. When welding PVC membrane strips, maintain a minimum of 6 inches of overlap to ensure proper sealing. This installation will prevent any grooves and increase the roofing membrane’s resistance to strong winds.
Using leftover gravel as temporary weighting can prevent wind uplift during installation. You can also use other heavy objects to temporarily secure the membrane to the base surface. However, if your old roof was installed using gravel, you already have the right material on hand.
Ensure that the membrane is secured reliably using staples or another method. The membrane must be securely fixed to the roof surface. Appropriate fastenings or adhesive solutions may be required depending on the installation method. Follow the manufacturer’s recommendations and instructions.
Do not use fasteners that can significantly damage the membrane structure, as this can lead to leaks. Instead, use special fasteners and staples.
Conclusion
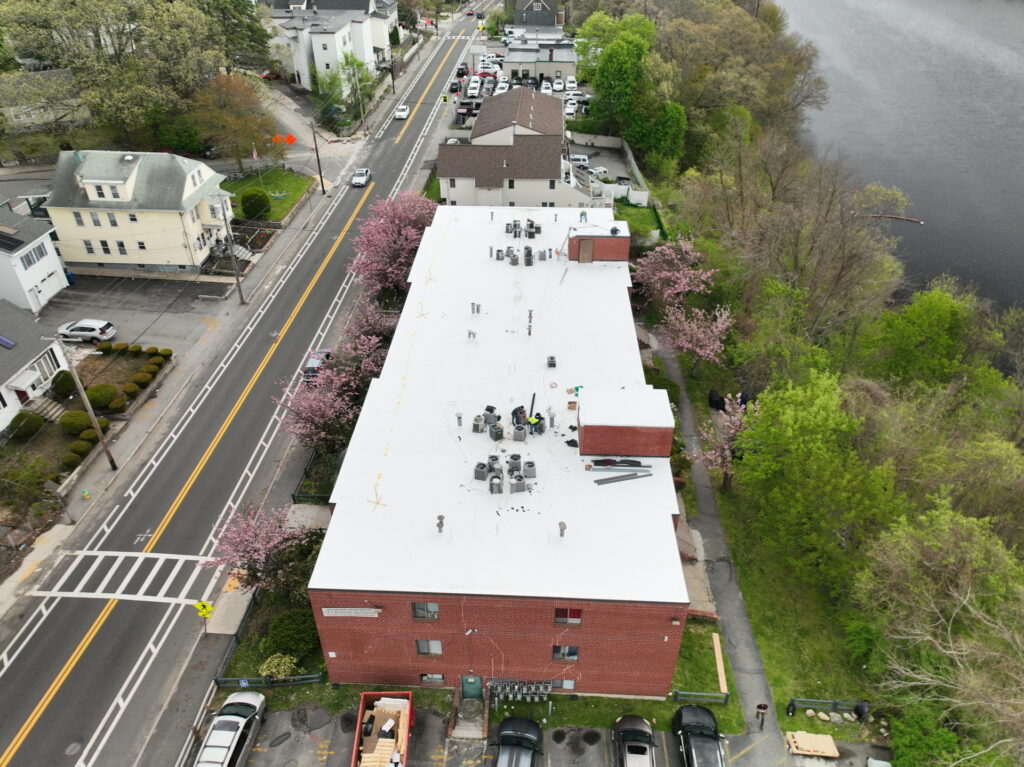
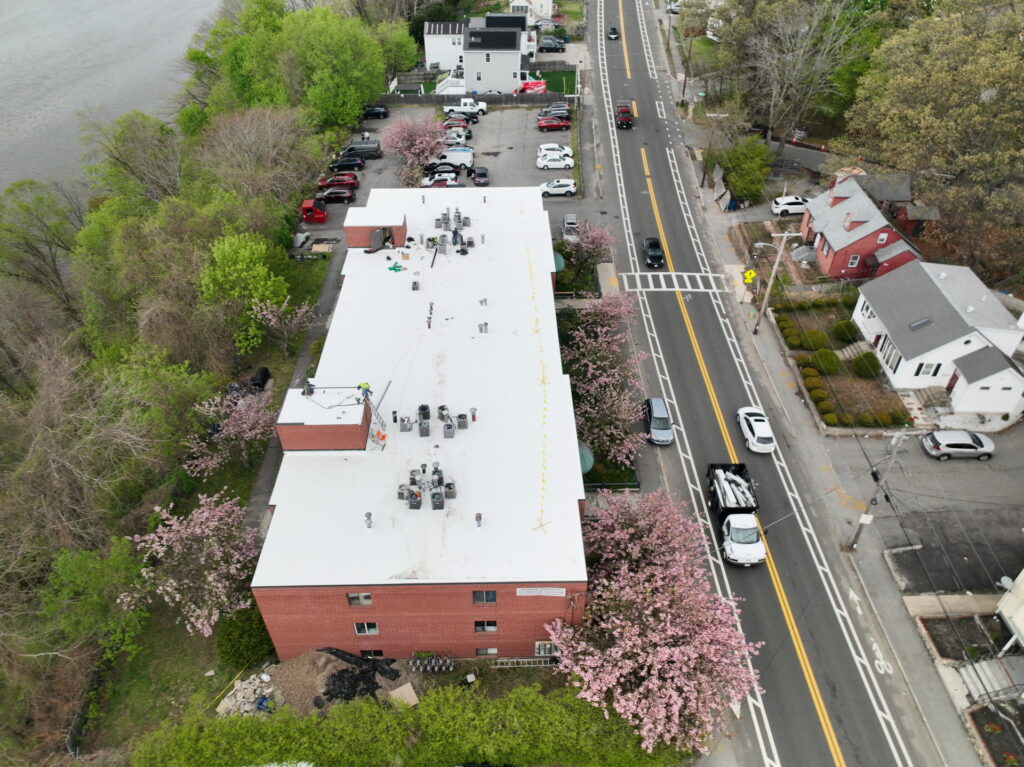
Replacing built-up roofing with a PVC membrane is challenging but achievable with careful preparation and attention to detail. By following these instructions, you can complete the project successfully. Remember that thorough preparation and adherence to instructions are critical to achieving a durable and practical roofing solution. If in doubt, don’t hesitate to seek professional assistance.
Denis is the driving force behind ID Flat Roof, a leading company in Boston specializing in flat roof repair and installation for over 20 years.
Expertise:
Denis excels in PVC, TPO, EPDM, and rubber roofing. His meticulous approach ensures quality and customer satisfaction.
Innovation:
Denis incorporates cutting-edge solutions like skylights and solar PV roofing.


