


Picture Frame Deck: Functions, Installation, and Design
Reading Time: 6 minutesInstalling the picture frame around your deck is a simple yet elegant way to hide the ends of your deck boards. Generally, it doesn’t call for advanced carpenter skills. However, you might face certain tricky obstacles along the way.
This short but explicit guide will help you determine whether you can master the DIY process or whether you have to hire commercial roofing contractors.
Defining a Picture Frame Deck
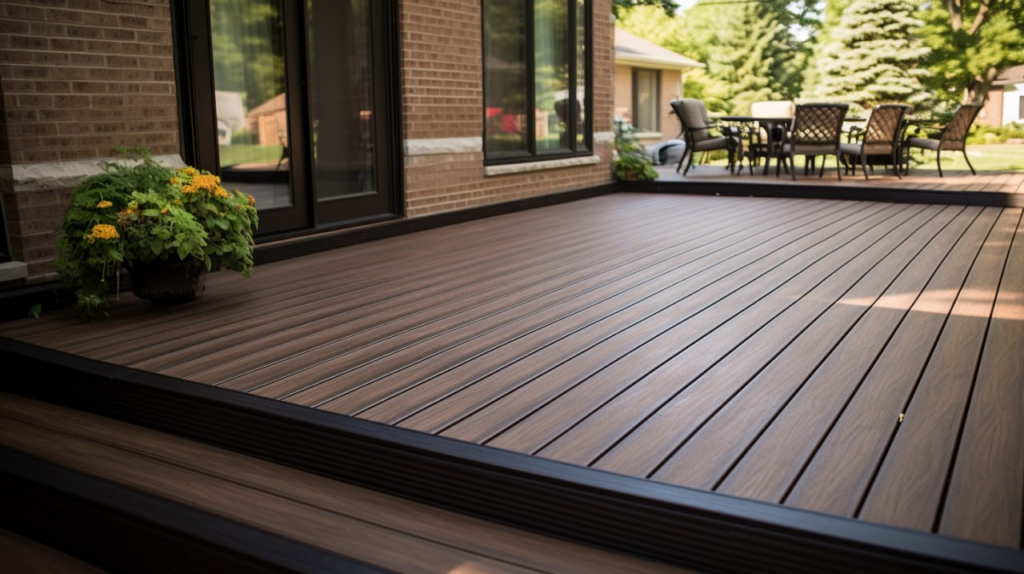
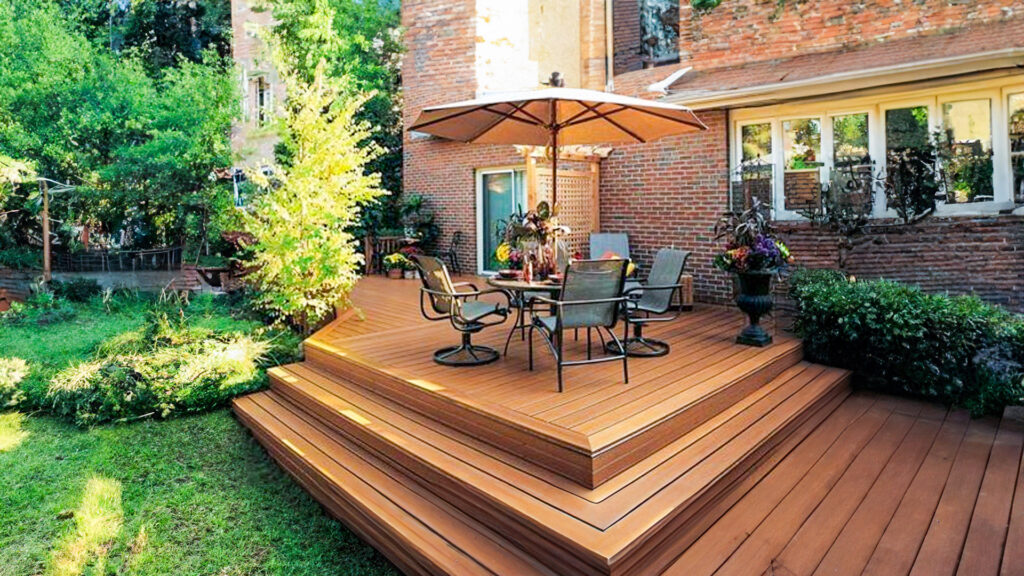
The term ‘picture frame deck’ is more or less self-explanatory. Essentially, it is a square frame around your deck. As a result, the whole construction consists of two major parts:
- picture frame border;
- infill deck boards.
Of course, you can manage without the frame. It will save you time and cut your expenses. Still, the picture frame deck possesses bonus points worth the extra effort.
Safety
Hidden board ends are not only a visual candy but also protect decking material and cause fewer stumbles. It boosts the longevity of your deck and minimizes the number of potential injuries.
Aesthetic
Raw ends look untidy, especially when the marks of wearing and tearing become noticeable. A neat frame around them will add a dash of modern luster to the classic look.
Value
Extended life expectancy and upgraded appearance will positively impact your home’s market value. Of course, now you might not intend to sell the property. Yet, if you do, this venture will play in your favor.
How to *Picture Frame a Deck
At first, the process is as simple as it gets:
- You start with carving frame boards.
- First, you fasten the border.
- After that, you measure, cut, and append your infill materials to the construction.
However, the deeper you dive into the details of this algorithm, the more hidden impediments you uncover. Luckily, there are multiple tips and tricks to overcome them.
Before You Start
If you are a wizard, you learn a corresponding spell, and tools magically do the job for you. Yet, the more odds-on scenario is that you’ll have to deal with equipment, materials, and layouts yourself. Therefore, you have to be thorough with the preparatory stage of your endeavor.
Time Management
Generally, deck building is a moderately challenging task. As a result, it can be relatively time-consuming. It will require at least 2 hours to complete this project. Hence, schedule your activities accordingly.
Instruments
On the one hand, the abundance of modern tools that assist you in accomplishing various tasks is a blessing that makes the job easier. Yet, on the other hand, you have to learn to use them before you can put them into action.
| Safety | Cutting & Carving | Fastening | Measuring |
| Safety glasses | Power miter, circular, or track saw | Cordless driver (+ drill) | Measuring tape |
| Gloves | Jig saw | Construction screws (refrain from using nails) | Carpenter Square |
| Oscillating multi-tool to nip off corners if needed | Driver bits |
Cutting & Carving Tools for Picture Frame Deck
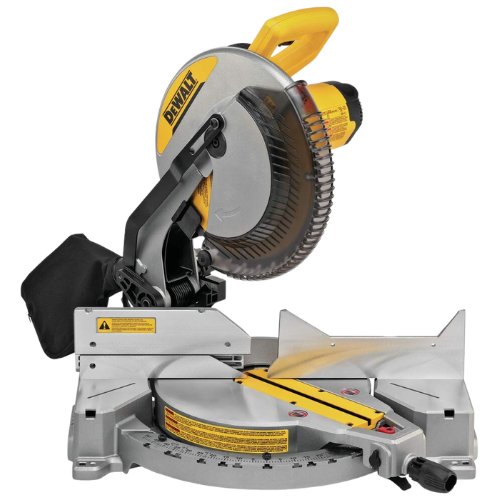
Power Miter Saw
FOR CUTTING COMPOSITE DECK BOARDS:
For cutting composite deck boards, use a power miter saw with a fine-toothed, carbide-tipped blade. Opt for a 12-inch blade with 100 teeth or a 10-inch blade with at least 80 teeth for standard materials and a minimum of 90 for advanced PVC.

Jig saw
FOR PRECISE CUTS AROUND RAIL POSTS:
A jig saw with a fine-tooth blade is ideal for detailed notching around rail posts. This tool can also efficiently cut through composite decking materials.

Oscillating multi-tool
FOR PRECISE CUTS IN COMPOSITE DECKING:
Employ the Oscillating Multi-Tool with a fine-tooth blade for precision cuts in composite and PVC decking. It features a high-efficiency brushless motor and a quick-change system for rapid blade swaps. Ideal for detailed work requiring accuracy within millimeters.
✅ Important Warning
You can be an experienced carpenter or enthusiast, but you should not skip reading the instruments’ manuals and follow their instructions.
✅ Word of Advice
For your safety and comfort, you should assess your skills adequately. If the workload is beyond your capabilities, you might need a helping hand. For instance, you can call commercial roofing contractors to do the job.
Essential Tools for Effective Deck Fastening

Cordless Drill
Perfect for Quick and Precise Screw Fastening in Decking
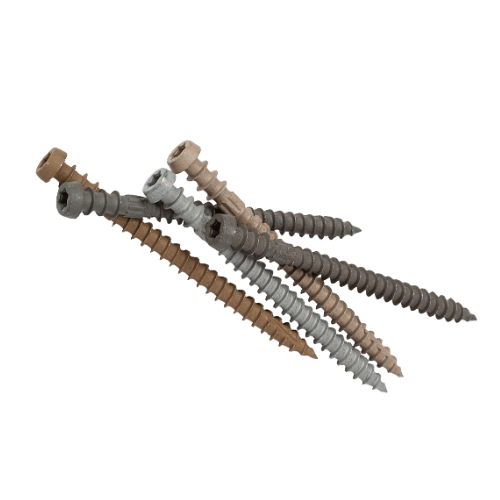
Color-Matched Fasteners
Combining Security with Aesthetic Appeal in Decking

T-Tap Driver Bit
Precision Tool for Efficient Fastener Installation
Preparation & Planning
The best way to avoid unnecessary complications is to resolve them in advance through planning. Remember that the deck is a part of your house. Therefore, it has connections with other construction elements that you need to consider before you put the process into motion.
Railing Posts
If your design involves installing a railing afterward, you have to think the process through and decide whether you prefer:
- Put railing on top of the already installed deck boards
- Trim the deck boards to fit the existing railing posts.
In most cases, you can either carve holes in a framing board and put it over the posts or use the shorter panels to notch them around your railing. You can also combine these techniques: cut a hole in the middle and notch the ends.
Deck Joists
Your picture frame deck requires support and a foundation to which you fasten it. As a result, you have to install blocking or joists before proceeding with the frame. In addition, you need to check if your posts are securely blocked and correctly spaced (boards running in parallel with the joists require extra blocking).
Layout & Materials
Field decking narrows your options. Yet, there are particular parameters that you can select:
- The shape of your deck. The most appropriate variations are a square or a rectangular one.
- The decking material. It can be either a wood deck or a composite deck. You can also combine them to create a more exquisite design pattern.
Measure and Cut the Boards
After you planned and prepared everything, it’s time to initiate the process. First, you need to make the materials ready for installation. As you cut the boards, remember to:
- Make sure that you attach mitered corners to rim joists. It implies a strictly 45-degree angle for the cut.
- Allow your picture frame boards to overhang the rim joists by 1”. You can use this space to hide fascia boards underneath.
- Check your saw to determine that it suits your purpose. For instance, a cordless drill is not a fitting solution in these circumstances. Meanwhile, you can use a jig saw for wood and composite decking.
- Refrain from cutting more than one deck at a time.
- Ensure that the measurements are correct.
Fasten the Boards
- Lay down the boards.
- Install the picture frame, secure and fasten it in place.
- Fasten infill deck boards to the picture frame.
Helpful Sidenote
Distribute your screws and other fasteners evenly. In this case, you will be sure the construction is rigid and secure.
Picture Frame Deck Upgrades
Of course, various enhancements can contribute to adding a personal touch to your picture frame deck. For example, you can:
- Install lights in your picture frame border.
- Lay out your deck and framing boards with contrasting colors.
- Highlight the object or place with installing the picture frame.
- Add more frames to a single board frame to create a unique pattern.
Care & Maintenance
Every homeowner strives to keep the home’s deck as beautiful and shiny as new. Buying a special professional cleaner for your deck helps protect it from the deteriorating impact of dirt, moisture, debris, or unfortunate spills.
Final Thoughts
Picture frame deck hides deck edge. However, it is much more than that. It helps to make your deck safe, comfortable, and aesthetically pleasing.
Overall, installing a picture frame isn’t as simple as it seems. You might need the help of a professional deck builder or commercial roofing contractor.
Actual Projects, Real-World People
Explore Transformations of Outdoor Spaces by Real People
Unleash Your Creativity: Exciting Decking Stories
Denis is the driving force behind ID Flat Roof, a leading company in Boston specializing in flat roof repair and installation for over 20 years.
Expertise:
Denis excels in PVC, TPO, EPDM, and rubber roofing. His meticulous approach ensures quality and customer satisfaction.
Innovation:
Denis incorporates cutting-edge solutions like skylights and solar PV roofing.